
Snap® Model 9
Testing Instructions
Everything you need to complete the sleep study is included in your test kit. It contains the following items:

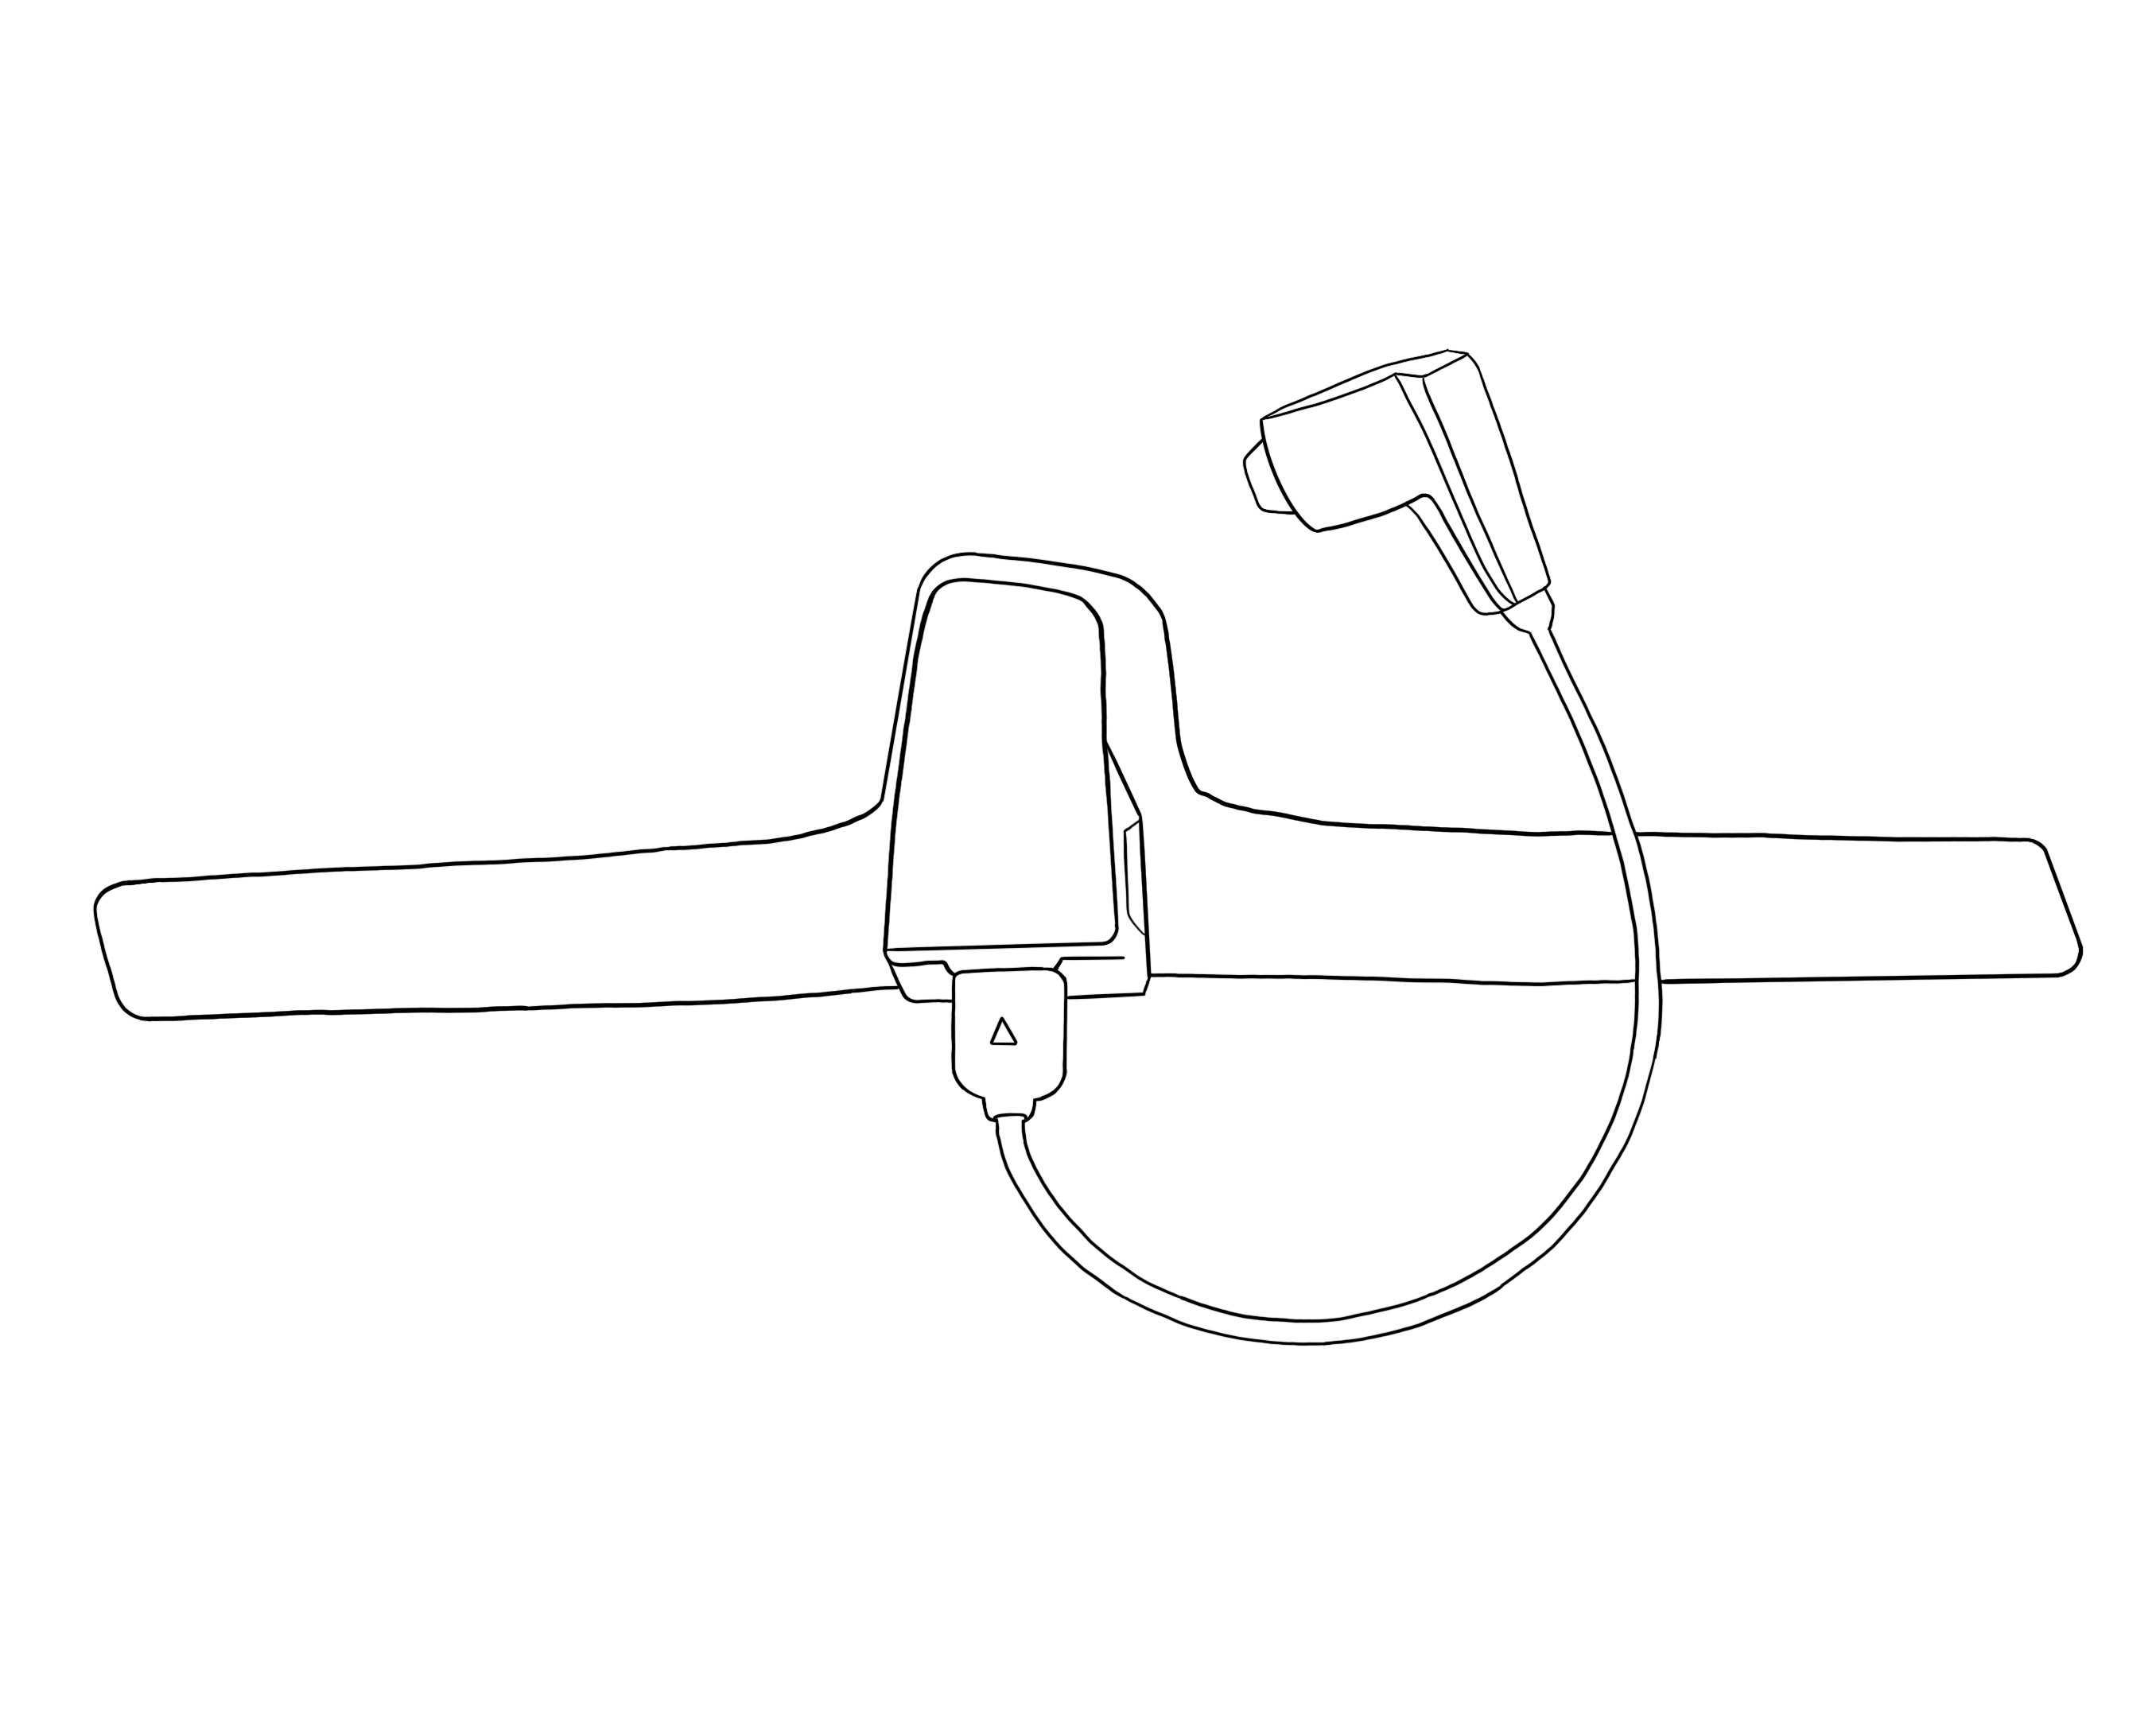
Sleep Apnea Monitor (SAM) + Belt
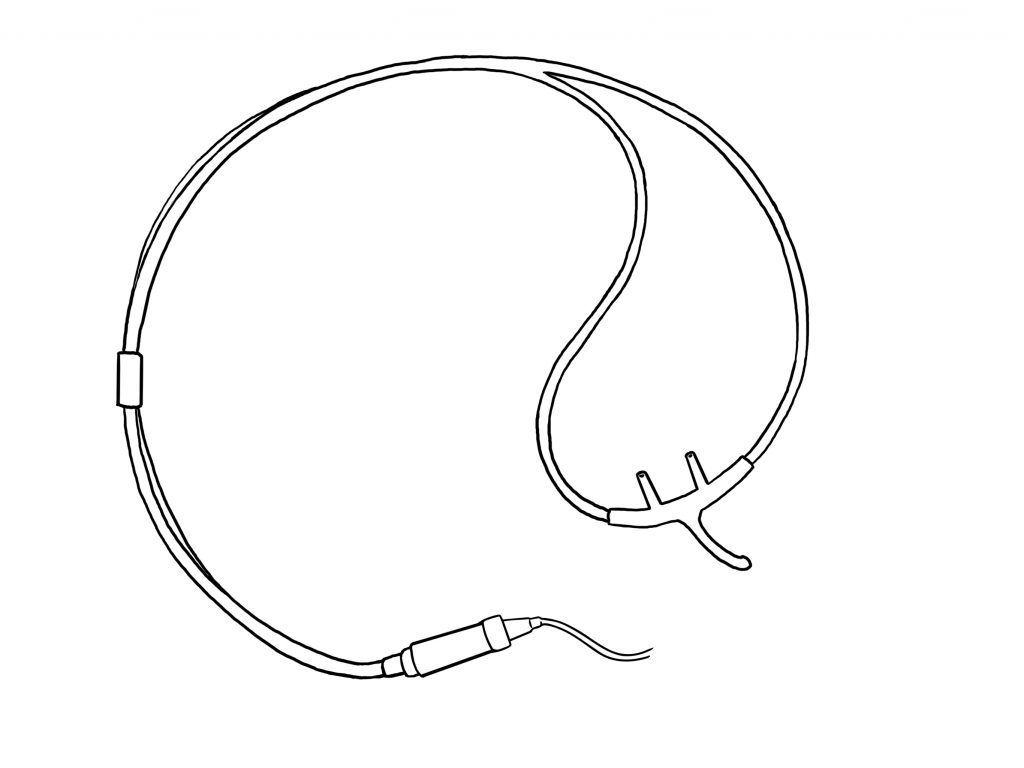
Airflow Sensor + Nasal Cannula
* Image depicts Three-Prong Cannula
Oximetry Watch Monitor + Ring Sensor
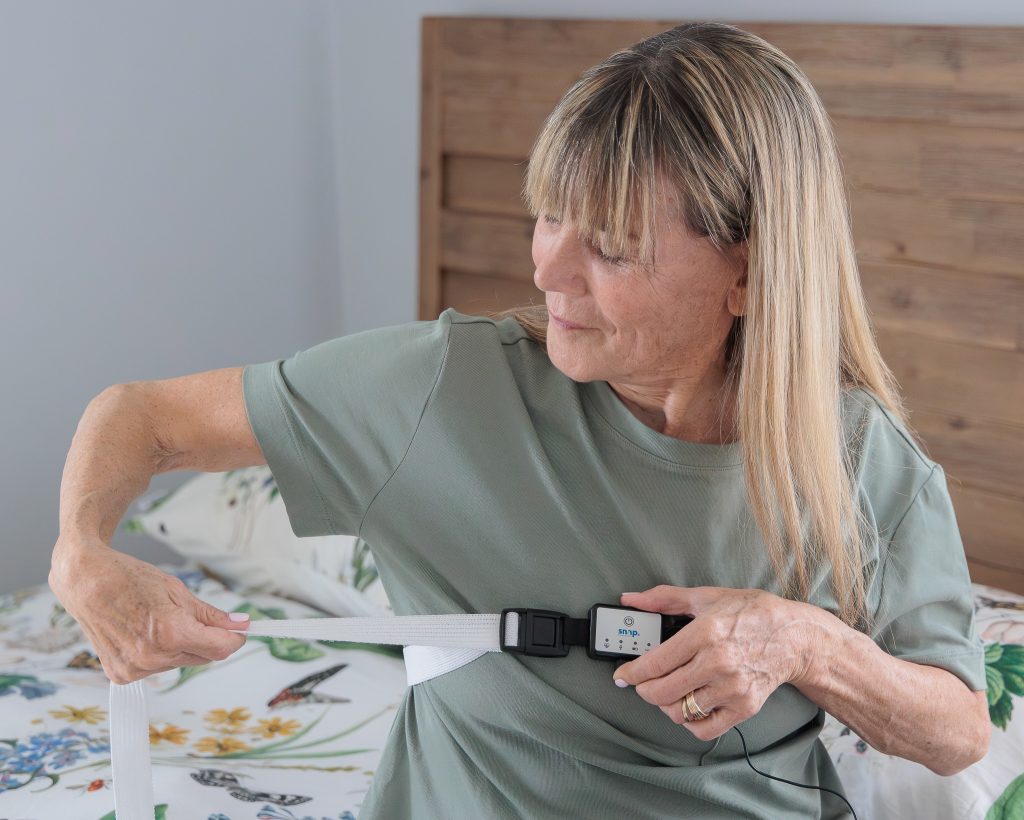
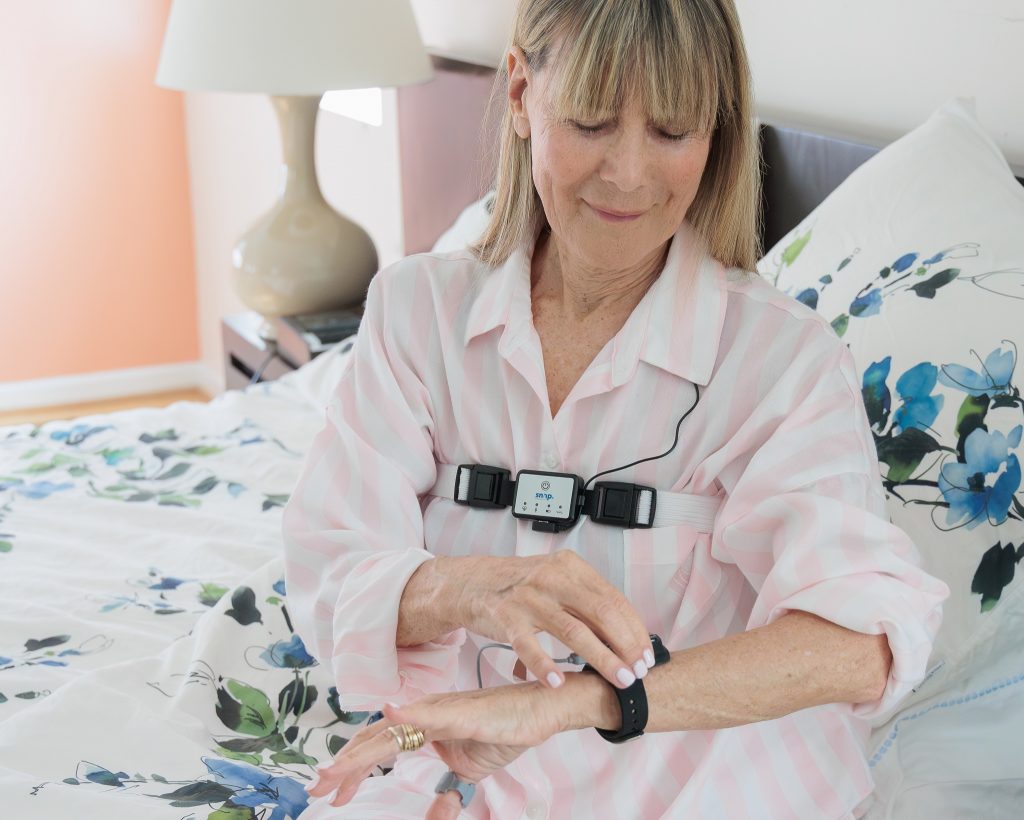
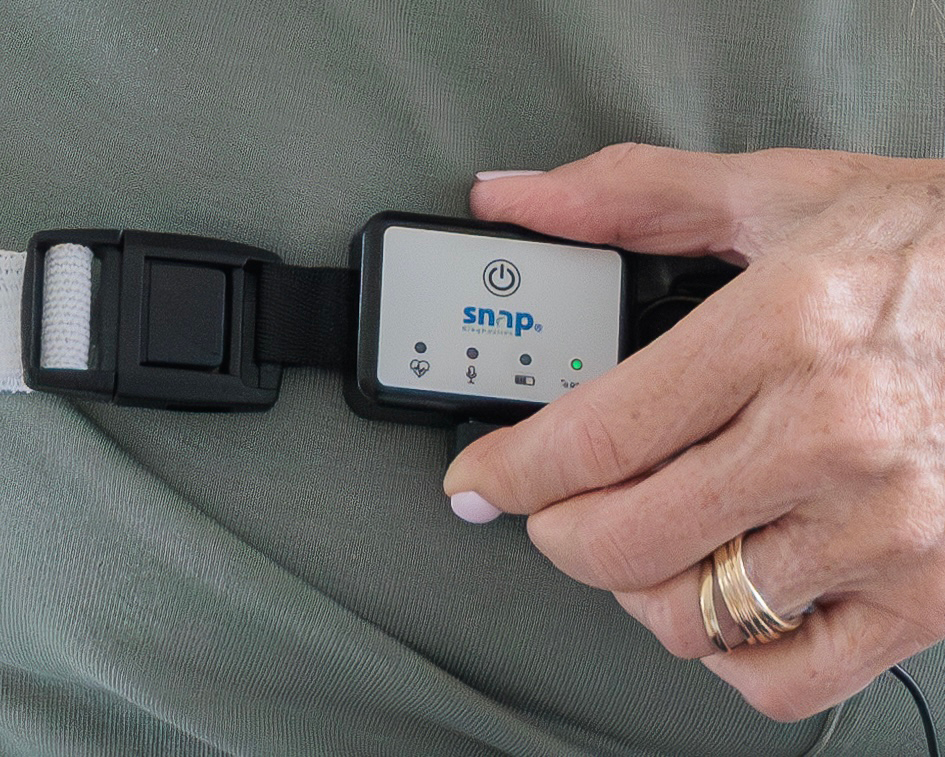
Step 1 — Put on the Sleep Apnea Monitor (SAM) + Chest Belt
Fasten the belt around your upper chest placing the Sleep Apnea Monitor in front, over your clothing, with the airflow connector facing down. Adjust the size so that it's snug, but comfortable.
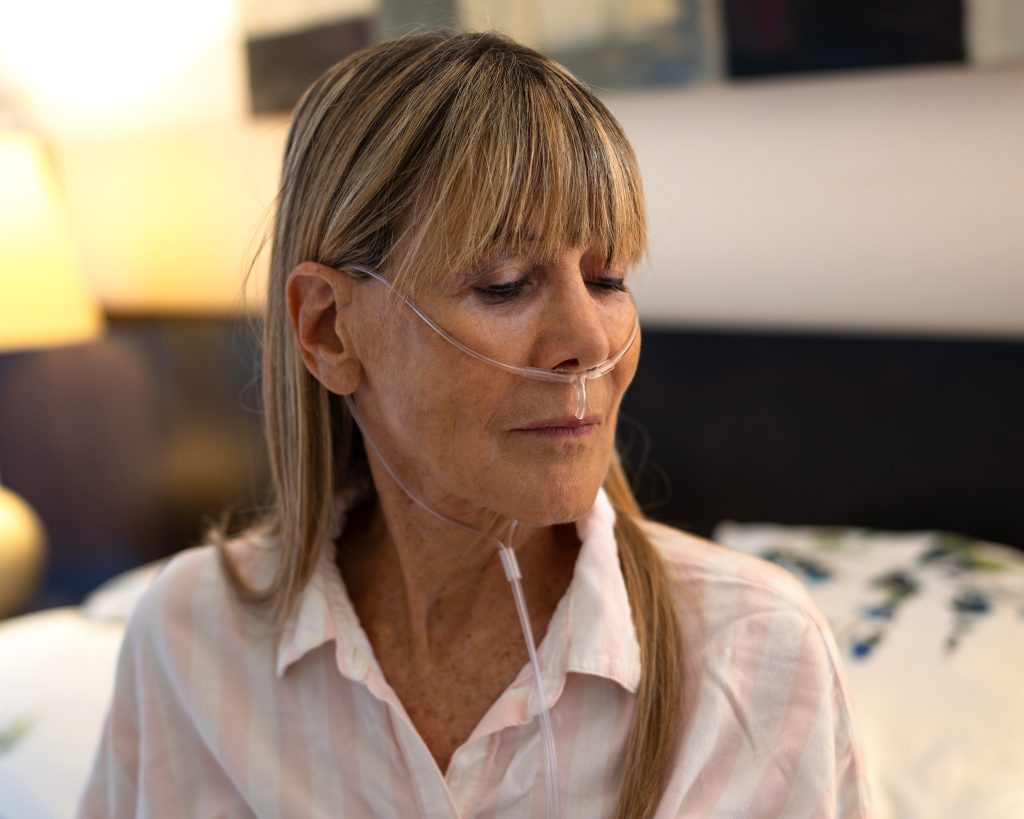
Step 2 — Put on the Airflow Sensor + Nasal Cannula
We have a few different types of cannulas to ensure your comfort and the accuracy of your sleep study. Please follow the corresponding instructions for the cannula that you received.
Each nasal cannula is single-patient use and can be fit to your measurement.
Three-Prong Cannula: This cannula uses its own tubing to secure the prongs in place under your nose.
Place the cannula under your nose, inserting the shorter pair of prongs gently into your nostrils and the longer prong pointing down towards your mouth. Route the tubing up and over the tops of your ears, just like you would wear eyeglasses. Guide the tube ends down to meet under your chin and adjust the slider/clip to tighten or loosen the tubing until the cannula feels snug and comfortable.
Three-Prong Cannula Instructions
Four-Prong Cannula: This cannula features an elastic headband to secure it in place.
Place the cannula under your nose with the shorter pair of prongs resting under your nostrils and the longer pair of prongs pointing down towards your mouth. The elastic headband fits around your head and over the ears. You can pull on the ends of the band to adjust the cannula for a comfortable fit.
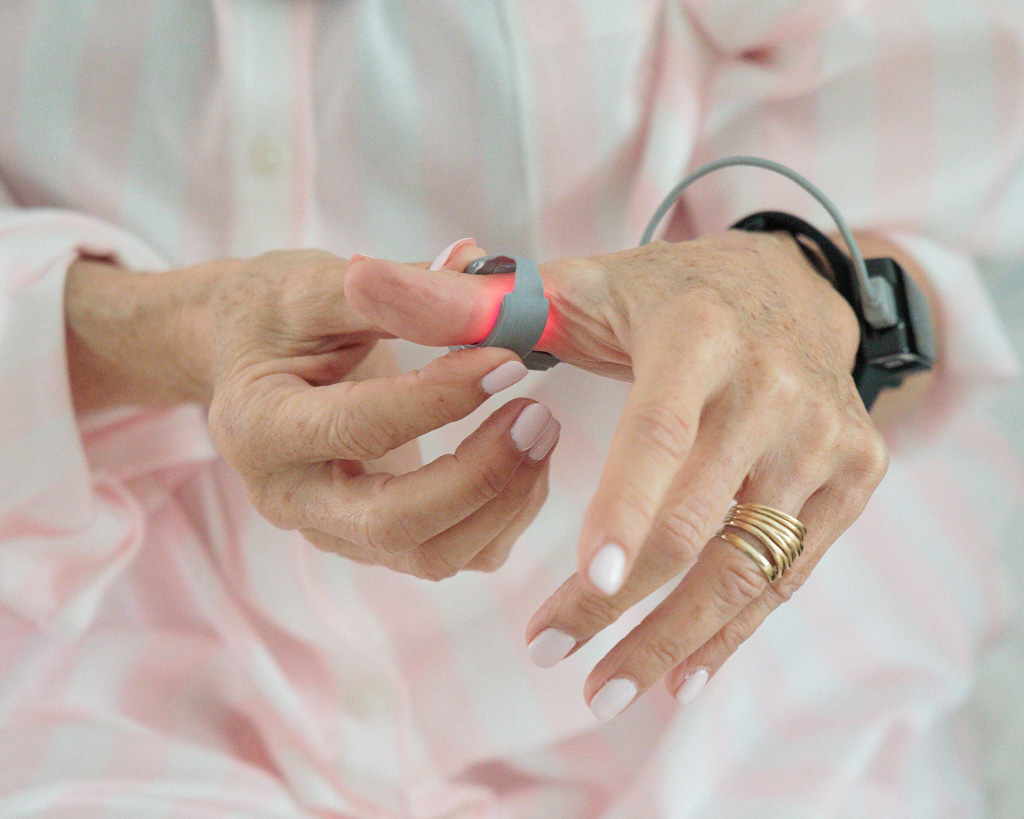
Step 3 — Put on the Oximetry Watch + Ring Sensor
The Oximetry Watch Monitor is worn around the wrist, like a watch. Strap the watch to your non-dominant hand. The fit should feel secure, and not too loose or too tight.
Place the ring sensor on your thumb. If the thumb is too tight, you may use a different finger. The ring should be placed at the base of your thumb or finger, where you would normally wear a ring.
See additional tips to improve the fit and ensure a good result.
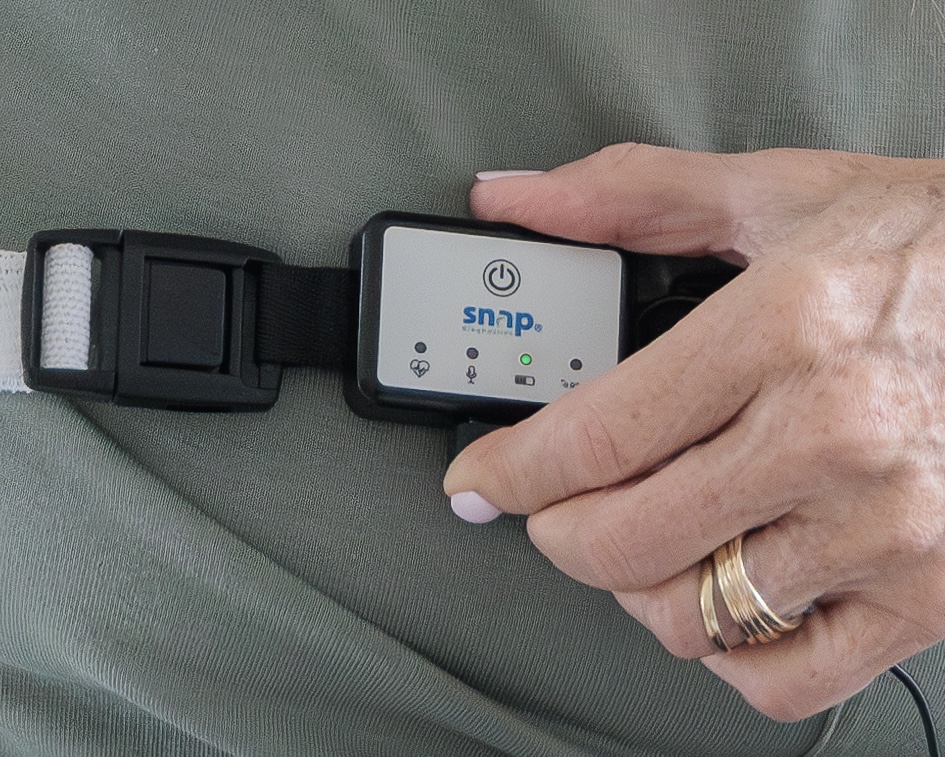
Step 4 — Turn on the SAM Recorder
Press the power/record button to turn on the SAM and start recording. The light above the battery symbol will illuminate.
Step 5 — Turn on the Oximetry Watch Monitor
Press the power button on the side of the watch to turn on the Oximetry Watch Monitor.
When powered on, the watch will automatically pair with the SAM.
If the ring sensor is not properly connected, the watch monitor will alert you with an Error 4 message. If you see this message, press the power button again to turn the monitor off. Ensure that the ring sensor is properly connected to the watch before turning the monitor back on.
Note that the ring sensor light will remain red throughout the recording.
Step 6 — Confirm SAM recording has started
Once recording has started, the "REC" light will turn green and blink every 5 seconds. The other lights on the SAM will turn off for a dark and comfortable sleep environment.
During recording, you may check the sensors by pressing the power button one time. This will illuminate all the lights for several seconds and allow you to confirm that all sensors are properly connected.
The recording will stop on its own after 6 hours of data collection.
After Your Test: Turning Off the Monitors
Sleep Apnea Monitor (SAM): The SAM records for 6 hours and usually turns off on its own. Do not manually turn it off unless you see it's still running when you wake up. If it's still on, press the power button two times quickly (a double-tap) to turn it off.
Oximetry Watch Monitor: The Oximetry Watch Monitor usually turns off automatically after the ring sensor is removed from your thumb/finger. If it remains on for over a minute after removal, press the power button once on the side to turn it off.
When testing for multiple nights, simply repeat these steps. If you are testing under different conditions that may affect your sleep, please be sure to document them.
If you typically use a PAP device, please see our FAQ on Testing with a PAP Device.