
Model 8 Testing Instructions
Testing Instructions
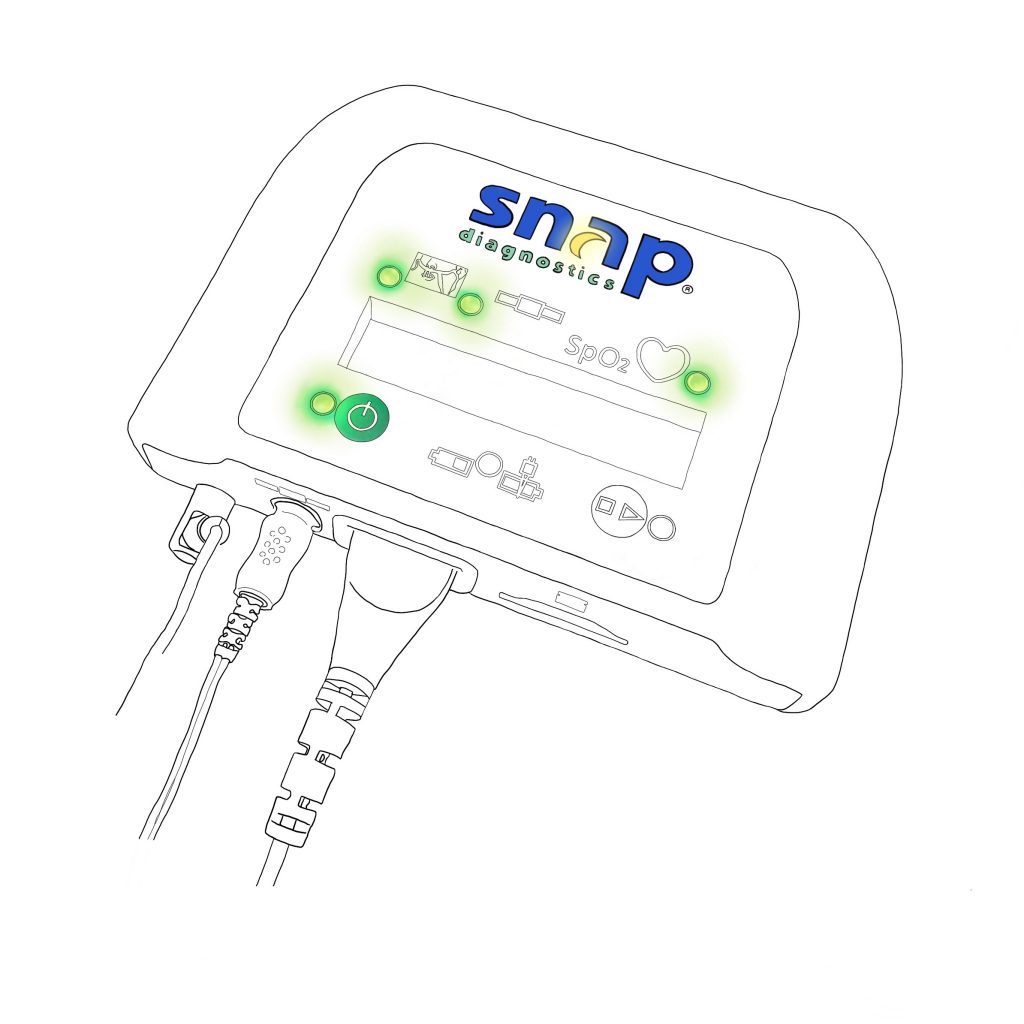
Step 1 — Turn On The Recorder
Press the green power button on the left to turn the recorder on. The light next to the power button should illuminate.
Step 2 — Connect to the Sensors
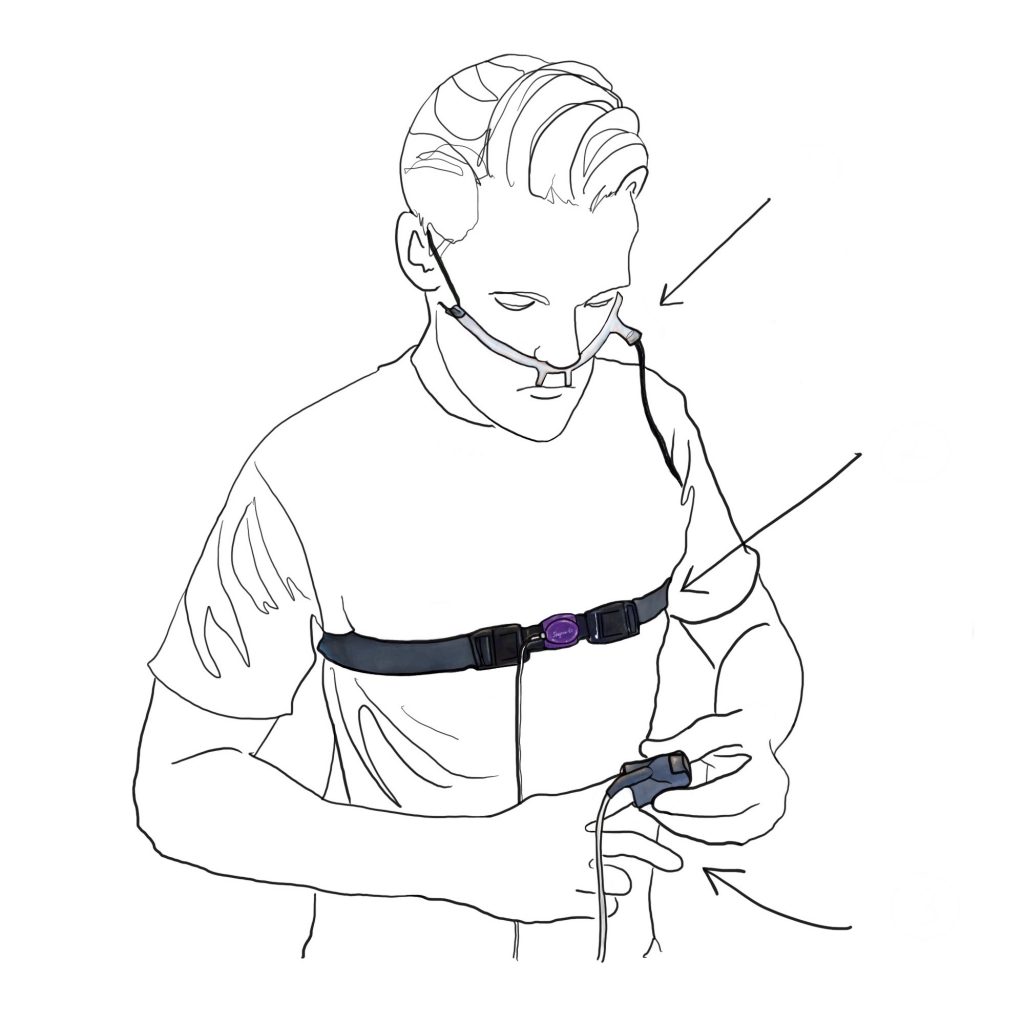
Connect yourself to the three sensors as shown.
1. Airflow Sensor and Nasal Cannula: This sensor measures your breathing patterns directly through airflow and sound.
We have a few different types of cannulas to ensure your comfort and the accuracy of your sleep study. Please follow the corresponding instructions for the cannula that you received. Each cannula is single-patient use and can be fit to your measurement.
2. Respiratory Effort Sensor and Chest Belt: This sensor measures your breathing effort through your chest movement.
Place the belt around your upper chest with the two ends fastened in front. Adjust the size so that it's snug, but comfortable. The belt should be worn over clothing.
3. Pulse Oximetry Sensor: This sensor measures your heart rate and blood oxygen levels from your fingertip.
Slide your finger into the sensor so that your fingertip just reaches the end of the sensor. See additional tips to improve the fit and ensure a good result.
Children receive a pediatric oximetry sensor that can be worn on either a finger or the big toe. For additional information, see our pediatric sensor instructions.
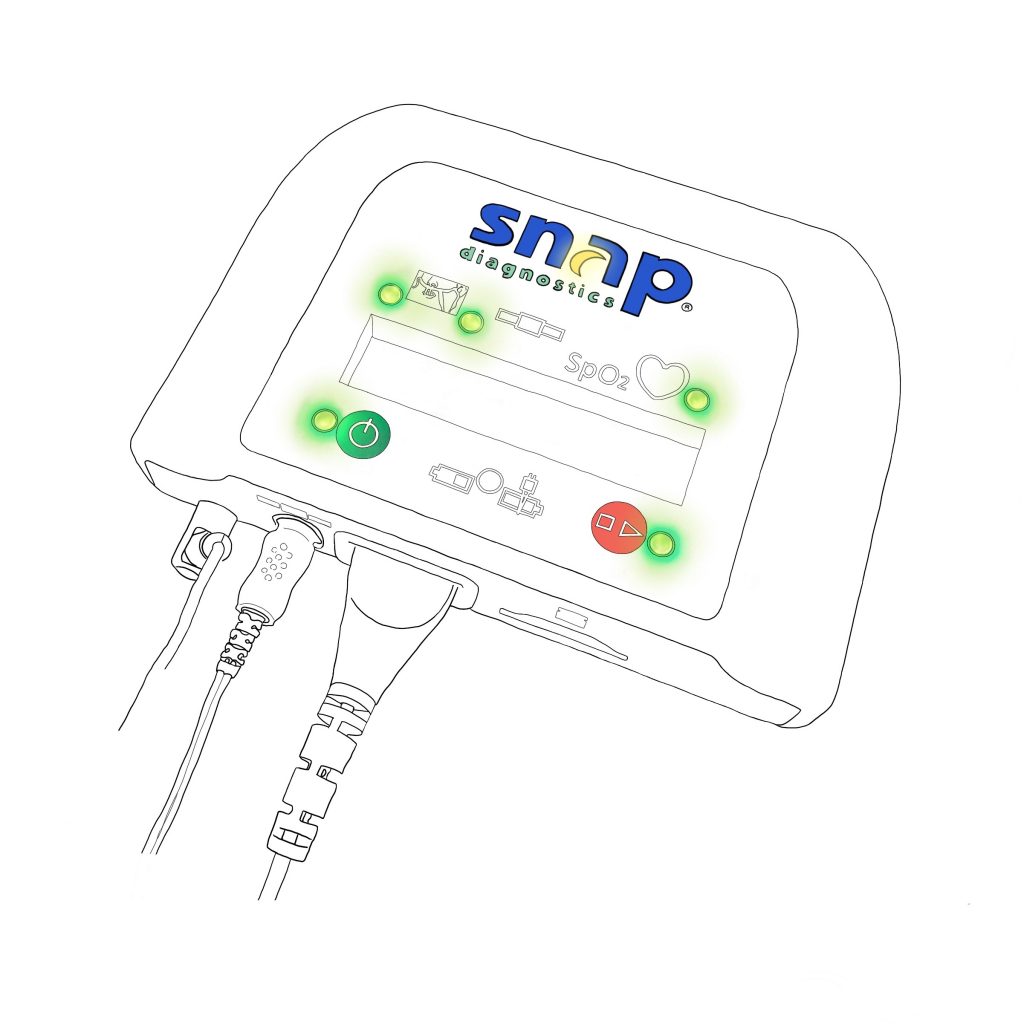
Step 3 — Press Record
Once all sensors are connected, press the red record button to begin recording. A green light next to the record button indicates that the device is recording.
Don't worry about stopping the recording. It will turn off on its own after 6 hours.
When testing for multiple nights, simply repeat these steps. Reapply the sensors and press the record button for each night of testing. If you are testing under different conditions that may affect your sleep, please be sure to document them.
If you typically use a PAP device, please see our FAQ on Testing with a PAP Device.